
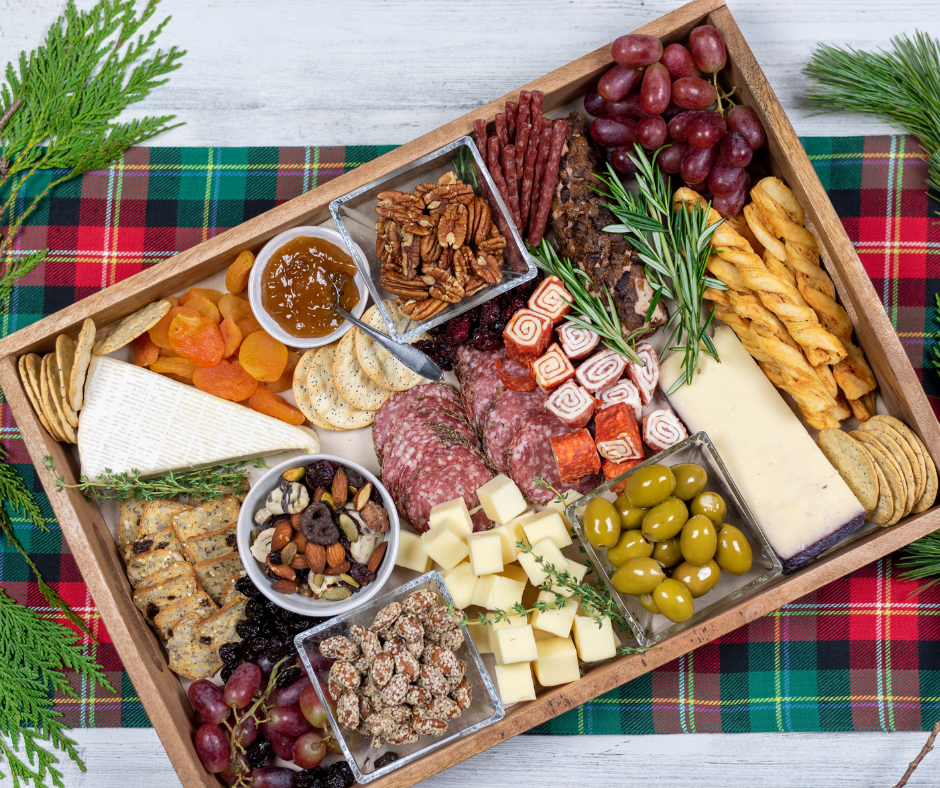
Your personal guide to creating the perfect Charcuterie board
As I sit and recall the many times my parents entertained people at our family home, especially during the holidays, one thing that always pops in my mind is their Charcuterie board/platter… my parents went all out when it came Charcuterie! Espcially for the holidays, they would make trips to an Italian deli in Columbus for specialty meats and sought out fun, funky cheeses and an assortment of crackers, breads and spreads.
At the time I didn’t know how much this simple, yet gorgeous display of nibblers would impact my adulthood entertaining. I’ve lost count the number of times I’ve created my very own Charcuterie board for nothing special, just dinner. The kids always delight at the rolled-up meats, cheeses, olives and on occasion fight over marinated feta and artichokes. Everyone at the table finds their favorites but also enjoys critiquing new items added that show up every now and then.
Even for a late night snack, or impromptu date night and a movie, it’s common to find Richard and I sharing a small platter of Charcuterie between us.
I think because of my parents, my most favorite time to put togeher a Charcuterie board/platter is during the holidays. It’s incredibly easy (and fun) to put together, can be prepped a head of time and stands out like a piece of art on the table.
What is Charcuterie anyway?
Charcuterie is actually a French term used as far back as the 15th century which literally means ‘the products of a fancy pork butcher’ (thank you Wikipedia). This includes cooked and cured meat products like hams, sausages, terrines, and pâtés. While traditionally that was the jest of it, these days a charcuterie board implies a spread of cured meats, cheeses, fresh fruits, spreads, crackers, and breads.
So what makes a Charcuterie board so popular these days…

It’s a fun way to appeal to all your guests! It allows for picking and choosing, creating one of kind flavor combinations… think of it as a one-of-a-kind food adventure for each of your guests. And the best part, you don’t have be fancy about it at all… the key is variety.
Below is my YOU WON’T BELIEVE HOW EASY AND FUN THIS IS, guide to putting together a Charcuterie board. I even have a shopping list you can download and print off or save for your convenience.
In my experience I believe there are 7 main elements, must-haves for a perfect Charcuterie board.
Meat
Fruit/Veggie
Cheese
Bread/Crackers
Extra’s (fillers)
Olives
What about the ‘board’?
There are adsolutely NO rules on the ‘board’ you use to display your Charcuterie. Slate, stone, wood, glass… the shape doesn’t matter either… what you have on hand in your the dish cabinet will work beautifully.
Let’s start with the meat…
You should plan on 2-5 varieties of meat, keeping in mind 4oz of meat for each person. This isn’t 4oz of each type of meat per person… just 4oz of meat per person. For example if you have 4 types of meat, plan for 1oz of each meat, per person.
When picking your meats, think of color and flavor. You can roll slices of ham or prosciutto while stacking pepperoni. For flavor, I adventure outside the meats listed above and include a spicy salami as well as a ‘funky’ salami. I highly recommed our very own Finocchiona (Fennel based salami) and Soppressata (Pepper salami).
Fruit/Veggies
Adding fruit and veggies is a simple way to make a bold statement and compliment the salty meats. Think of items that add a pop of color and balance textures (fresh and dried fruit).
Berries
Roasted Red peppers or roasted tomatoes on the vine
Grapes
Apple slices (sweet and tart)
Dried apricots or figs
Cheese
Don’t stick with one element of cheese… think soft cheeses like a brie paired with both a firm and stinky cheese. You can also slice, crumble or cut a small wheel of cheese into wedges. Here is a fun idea… look for small wedges in the ‘scrap’ bin in the cheese department for an economical way of trying new cheeses.
Asiago,
Gouda (aged or smoked)
Brie
Stilton (I recommend a cranberry stilton during the holidays)
Cheddar
Fresh mozzarella
Breads/Crackers
I think it’s safe to say we have all be engrained that meat, cheese and crackers are the perfect combination.
As you choose your breads and crackers, think about shapes and sizes (and be sure to grab a grain-free, gluten-free option for those guests who have a dietary restriction – there are great alternatives out there these days). Remember, variety is key!
Bread sticks (work beautifully in a glass to give height)
Sliced crostini
Crackers (a few types)
Cheese crisps
Pretzels
Bagel chips
Now to fill in the spaces with extra’s that give uniqueness to your spread. There is no minimum on how many you select from this list…
Nuts
Spreads
Pepper jelly
Miniature pickles
Spinach dip
Chocolate covered almonds or pretzels
Honey
Marinated artichokes/mushrooms
I think I’ve eaten enough Charcutier boards to say it is essential to have olives, even if just one type. Go with a specialty olive, like kalamata or a variety of stuffed olive… stay away from the black olives in the can.
A few Tips

You want your board full and abundant so have extra’s on hand. You want to fill every hole you see.
Place bowls or ‘feature’ item (like our Finnochinia or Soppressata) on the board first then build the rest of your items around them.
It’s helpful to know which platter/tray/board you will use a head of time to make sure you have enough to fill it up.
If you want, you can even use smaller platters/trays/boards if you prefer. One for cheese and crackers, another for meats while using your ‘extra’s’ to fill in any holes.
Don’t forget little knives, forks, spoons, and mini-tongs so your guests can easily grab what they want.
Don’t feel limited to the contents of the lists I provided. Make it your own masterpiece!
Now that you have everything, here are the steps to putting together your Churcuterie board
1. Spread meat outs by type on the board – don’t huddle them all together in one corner. Roll, slice, and stack your different meats to give attention to the different types.
2. Tuck in spreads, olives, etc. in small bowls on the board.
3. Arrange the cheeses along side the meats – slice hard cheeses, and spread them out like you would a deck of cards.
4. Add fruits and veggies
5. Place Crackers on the board
6. Fill in any holes you have with granish or more ‘extra’s
Just look at your masterpiece!! I’m sure it’s beautiful and tastes amazing!! See that was easy and fun wasn’t it?! Now, think of all the creative versions you can make for other holidays…
Before I forget, here is my conveient shopping you list can refer to when shopping for your Charcuterie board items. You can download here.

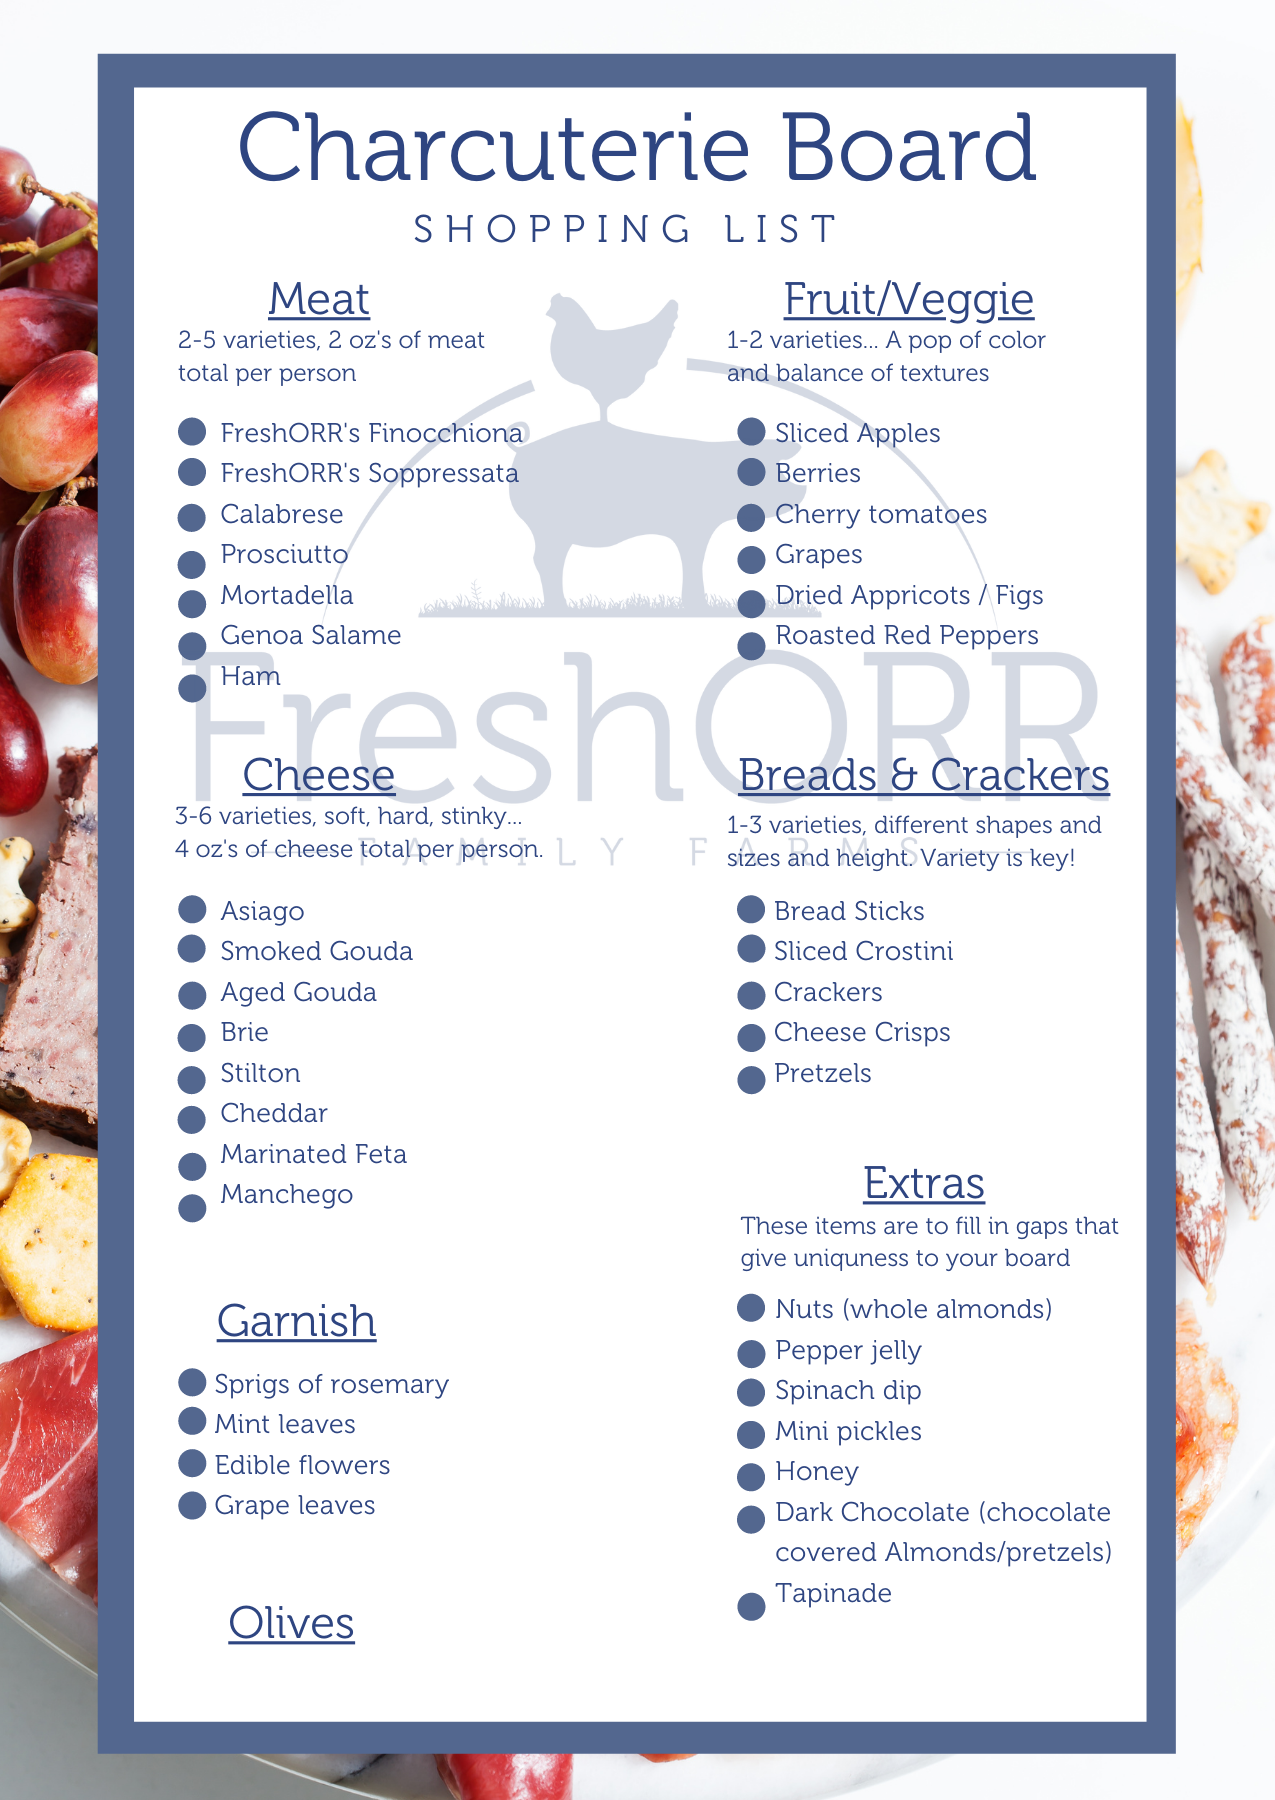
Oh, and let’s not forget those old-world salami’s created with our pasture-raised hogs that will take any Charcuterie board to the next level. Check them out here!
I can’t wait to hear how your friends and family were so impressed by your Charcuterie board!
I hope to see you soon on the farm.
Until then, May God’s peace surround you this holiday season,
Gina
Through transparency and regenerative farming practices we steward God's creation so the meat we raise for you is better for your body, provides a better life for the animal and a better future for your children and our land